Introduction
DAC((Detection As Code), detection is a strategic method that seamlessly integrates the security detection mechanism into the life cycle of software development. By considering security control as a code, the organization can automatically deploy, configure and maintain security measures throughout the SIEM operation and maintenance process.
Perhaps many people have heard of the concept of DAC, but have not been realized step by step. This article guides you to use Sigma rules, gitlab Ci/CD and SPLUNK deployment detection, which is the code pipeline.
do not be afraid! If you plan to build a pipeline that detects the code in accordance with the content demonstrated herein, you only need to have a basic understanding of Docker, Gitlab, Git, Python, Sigma Rules, and YAML.
Let’s start!
Related concept
Sigma and Sigmac
title: Ingress/Egress Security Group Modification
id: 6fb77778-040f-4015-9440-572aa9b6b580
status: test
description: |
    Detects when an account makes changes to the ingress or egress rules of a security group.
    This can indicate that an attacker is attempting to open up new attack vectors in the account, that they are trying to exfiltrate data over the network, or that they are trying to allow machines in that VPC/Subnet to contact a C&C server.
references:
    - https://www.gorillastack.com/blog/real-time-events/important-aws-cloudtrail-security-events-tracking/
author: jamesc-grafana
date: 2024-07-11
tags:
    - attack.initial-access
    - attack.t1190
logsource:
    product: aws
    service: cloudtrail
detection:
    selection:
        eventSource: 'ec2.amazonaws.com'
        eventName:
            - 'AuthorizeSecurityGroupEgress'
            - 'AuthorizeSecurityGroupIngress'
            - 'RevokeSecurityGroupEgress'
            - 'RevokeSecurityGroupIngress'
    condition: selection
falsepositives:
    - New VPCs and Subnets being setup requiring a different security profile to those already defined
    - A single port being opened for a new service that is known to be deploying
    - Administrators closing unused ports to reduce the attack surface
level: medium
Sigma rule example ;
Sigma is an open source project that defines the standard for developing detection content and unrelated formats that are not related to suppliers. These rules are written in structured YAML format for human and systematic use. For my “detection is the code” pipe, I chose to use Sigma to create the detection content. The reason is as follows
Scalability: A SIGMA rule can be deployed to many discrete SIEM, EDR, NDR, XDR, and any “DR”.
Shared: sigma rules can easily share with other organizations or receive from other organizations.
Simple: threat detection analysts only need to master the standard for creating test content.
The SIGMA project includes Sigmac, which is a powerful Python command line tool that can use “back -end” to convert Sigma rules for controls such as SPLUNK, DEVO, ELK, and CrowDStrike. Create a custom back end for almost any detection control of detection logic.
In the pipeline of this article, we will use Sigmac to convert Sigma rules into Splunk -friendly SPL corresponding items.
Pipe infrastructure
In order to build a pipeline, we will configure the following three Docker containers and a Docker network called “DACNET” to provide version control, CI/CD, SIEM infrastructure, and connections between them:
gitlab: Gitlab community vector. I will use it as VCS to detect content and supervise the CI/CD pipeline.
gitlab-runner: Gitlab operator container for running CI/CD pipelines. This will be used to use additional Docker containers to build and deploy detection content.
splunk: SPLUNK search head and indexer, installed the Splunk Botsv3 data set at runtime. This will be used as SIEM. I will use the BOTSV3 dataset to demonstrate the creation and data source configuration of the SIGMA rule.
Construction and configuration
Docker
I made the following docker-compose.yml file to help me use Docker Compose to dynamically build infrastructure:
version: '3'

networks:
  dacnet:
    external: true
    name: dacnet

services:
    gitlab:
        networks:
            dacnet:
                aliases:
                    - gitlab
        ports:
            - '443:443'
            - '80:80'
            - '222:22'
        hostname: gitlab
        environment:
            GITLAB_OMNIBUS_CONFIG: |
                external_url 'http://gitlab'
                gitlab_rails['initial_root_password']='$DEFAULT_PASSWORD'
        container_name: gitlab-dac
        image: 'gitlab/gitlab-ce:latest'
    gitlab-runner:
        networks:
            dacnet:
                aliases:
                        - gitlab-runner
        ports:
            - '81:80'
        hostname: gitlab-runner
        container_name: gitlab-runner-dac
        restart: always
        volumes:
            - '/srv/gitlab-runner/config:/etc/gitlab-runner'
            - '/var/run/docker.sock:/var/run/docker.sock'
        image: 'gitlab/gitlab-runner:latest'
    splunk:
        networks:
            dacnet:
                aliases:
                    - splunk
        ports:
            - '8000:8000'
            - '8089:8089'
        hostname: splunk
        container_name: splunk-dac
        environment:
            - SPLUNK_START_ARGS=--accept-license
            - SPLUNK_PASSWORD=$DEFAULT_PASSWORD
            - SPLUNK_APPS_URL=https://botsdataset.s3.amazonaws.com/botsv3/botsv3_data_set.tgz
        container_name: splunk-dac
        image: 'splunk/splunk:latest'
To deploy it with docker-compose.yml file, first create a.env file under the current path
DEFAULT_PASSWORD=****  ****  **** #设置gitlab和splunk初始密码
EXTERNAL_URL=http://192.168.1.1 #修改ip地址为宿主机内网ip
After the creation of .env files, run Docker Network Create -Driver Bridge Dacnet to create a DACNET network
Run the Docker Compose Up -D and wait for the image to draw the creation container.

Gitlab runner
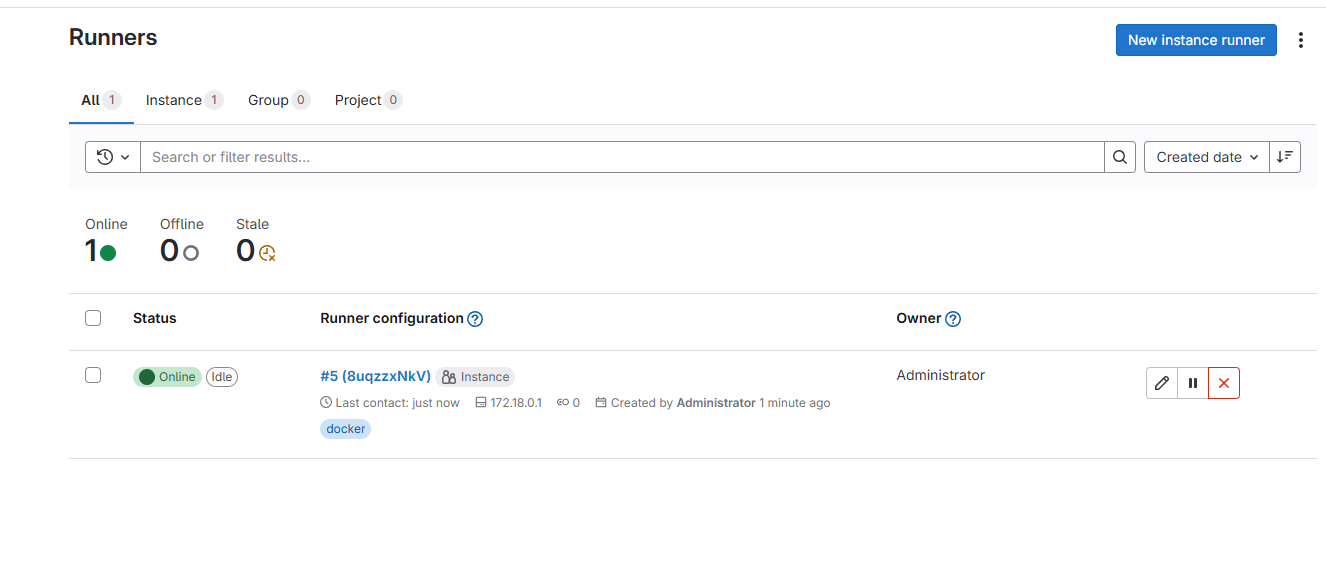
The Gitlab running program needs to be registered in the Gitlab CE before it can be used in the CI/CD pipeline. In Gitlab UI, create Runner, TAG can be set to docker
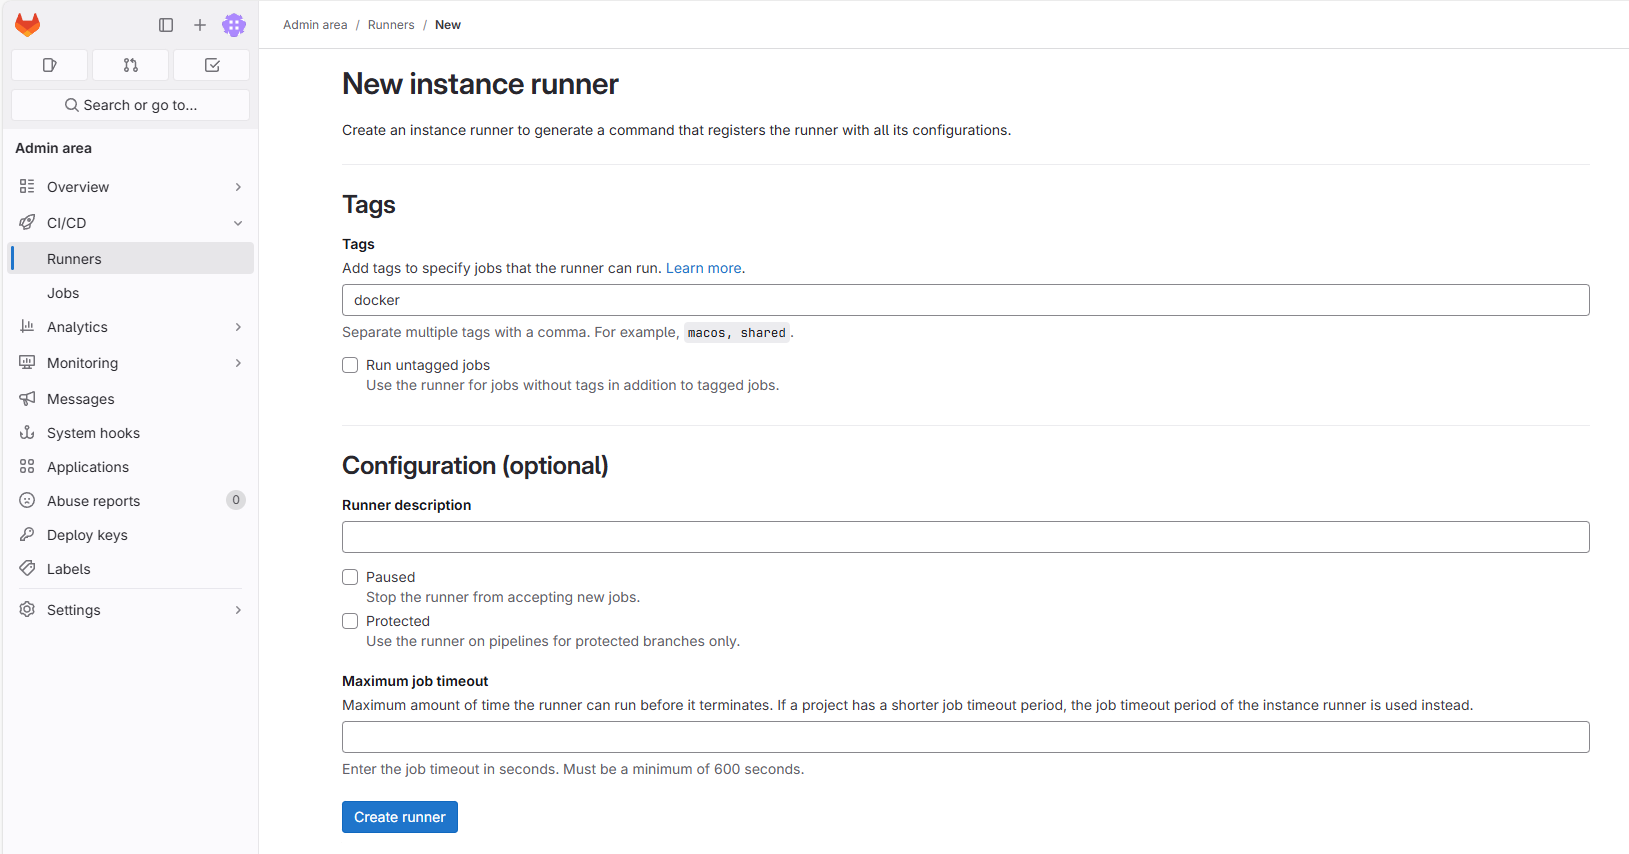
Use the page steps to use Docker EXEC-IT Gitlab-Runner Bash into Gitlab-Runner-DAC container
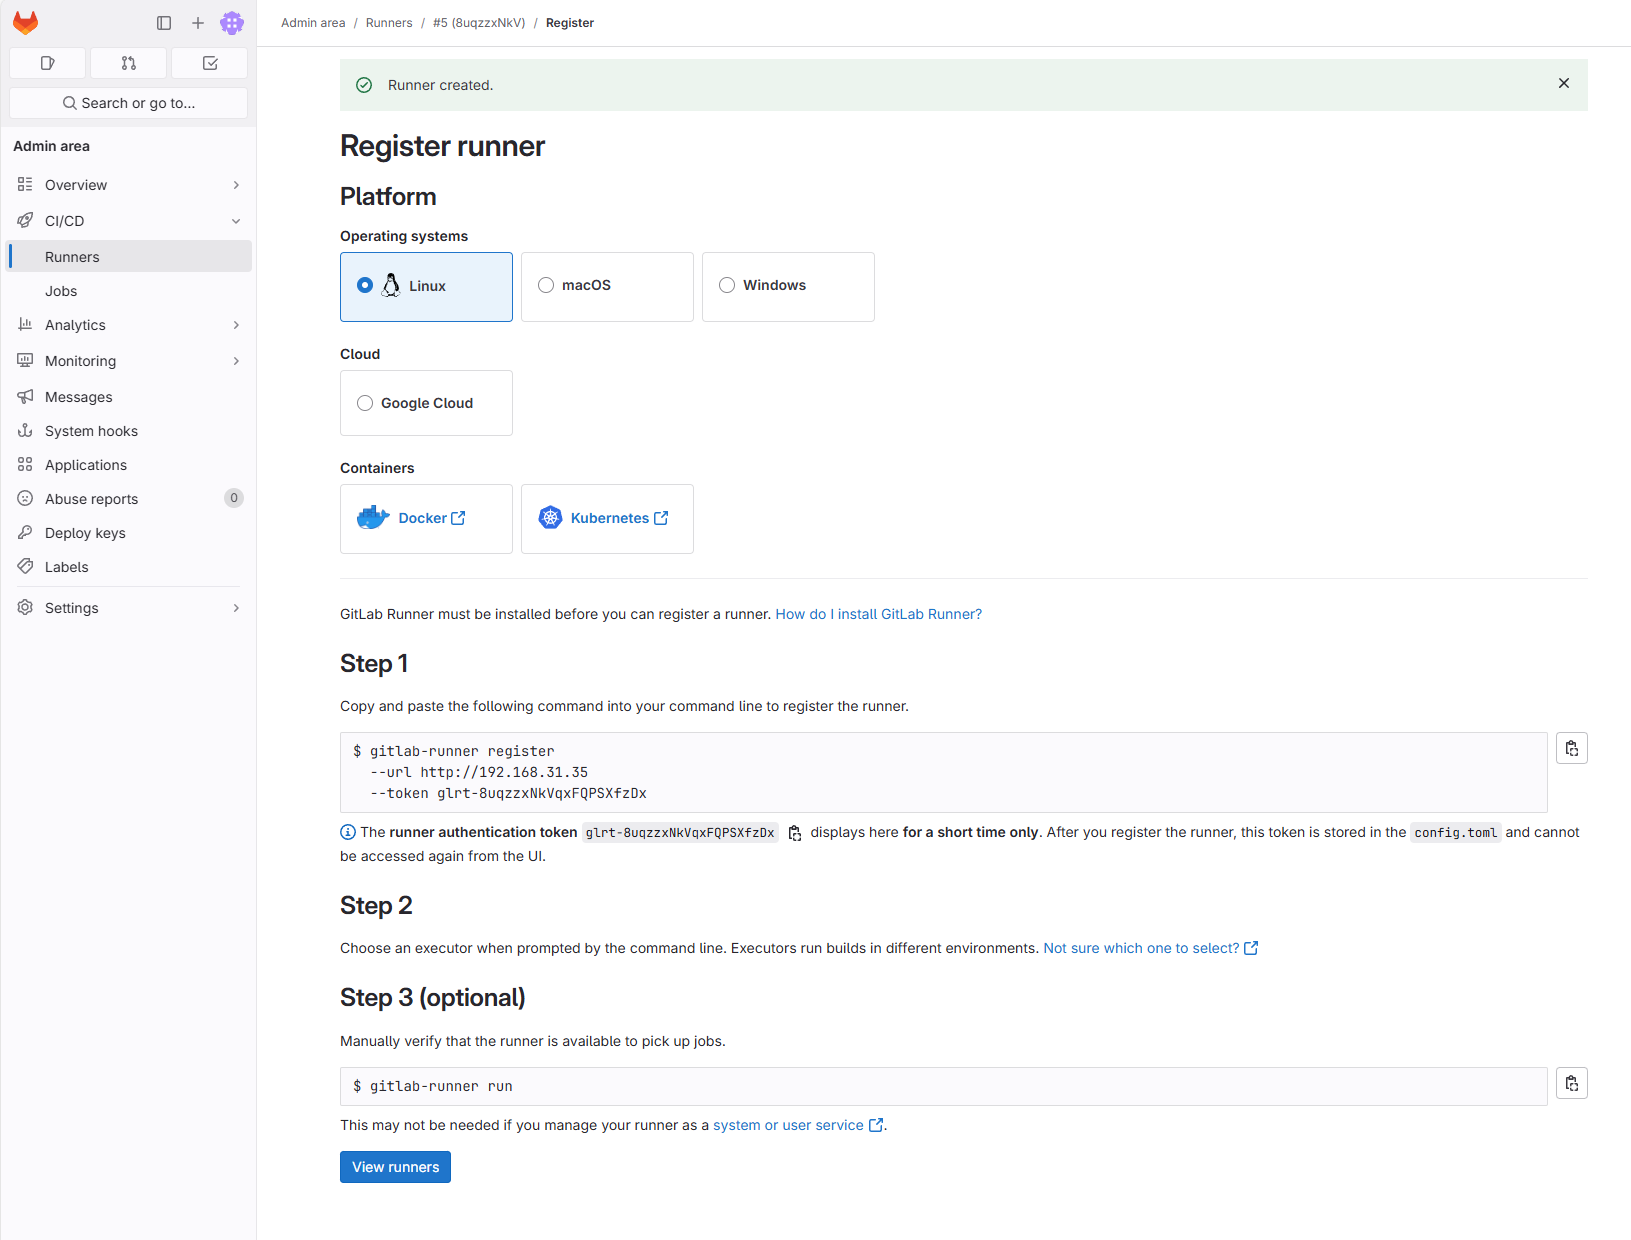
After the container registration is complete
Gitlab configuration Turn on Github Import for it to then import the project from github

Version control
Fork https://github.com/infosecb/detection-as-code This project to personal Github, import the project through Personal Access Token The project is the basis for the detection content CI/CD pipeline and VCS. The following is the rapid decomposition of the structure of the project:
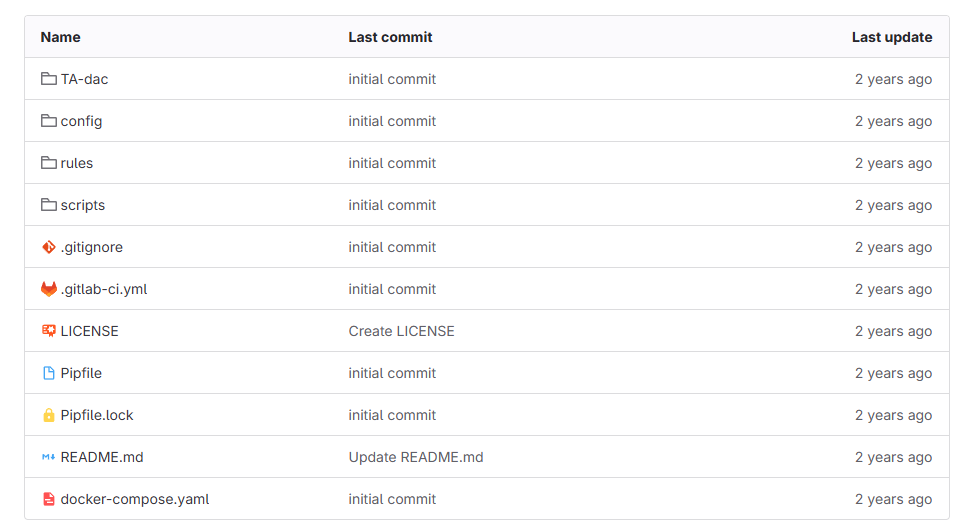
/TA-DAC: Includes the core template file required when constructing and packing Splunk technology additional components (TA). In this example, I will build a TA called TA-DAC. /Config: Contains Sigma data source configuration and mapping files. These files establish the relationship between Sigma data source and detection control data sources. In this example, I created a mapping configuration called “Splunk-Dac.yml”, which mapped the Botsv3 Powershell log index, source type, and field mapping to the appropriate Sigma data source. /Rules: Includes the SIGMA rules stored in the .yml format. The threat detection team can create, update and depreciate the inspection content here. /scripts: Three scripts containing CI/CD pipelines used to build and deploy detection content. I will study these scripts in the next section. .gitLab-Ci.yml: Gitlab Ci/CD configuration file, instructing how the Gitlab running program builds and deploys detection content. I will also introduce the file in detail in the next section. Everything else: PIPENV/PIPENV.LOCK files are used by PIPENV to install the Python package and its dependencies required in CI/CD operations. The docker-compose.yml file contains the same code I shared in the pipe architecture part above. Readme.md files include the title and basic description of the GitLab project, as well as. Gitignore told Git to ignore which files/folders to be ignored during the local development.
Gitlab CI and scripts The Gitlab CI provides an environment for construction, testing and deployment of any type of software. To create a CI/CD pipeline in Gitlab, the .gitLab-Ci.yml configuration file must be created in the project. This is the configuration I created. I explained this in the interpretation of the interpretation:
### Define two seperate jobs for CI/CD pipeline.
stages:
  ### The build job runs anytime a user commits code
  - build
  ### The release job only runs when the main branch is tagged with a version
  - release

build:
  ### Sigmac requires Python 3.8, specify the appropriate Docker image
  image: python:3.8
  ### Identify build stage
  stage: build
  ### Install Pipenv, Python dependencies and the Splunk Packaging toolkit.
  before_script:
    - pip install pipenv
    - pipenv install
    - wget https://download.splunk.com/misc/packaging-toolkit/splunk-packaging-toolkit-1.0.1.tar.gz
    - pipenv install splunk-packaging-toolkit-1.0.1.tar.gz
  script:
    ### Run Sigmac against all rules in the /rules folder that have been set to status=stable.
    ### Outputs to the out.yaml file with the resulting search logic and a few Sigma fields.
    - pipenv run sigmac --filter 'status=stable' --target splunk --config config/splunk-dac.yml  --output-format yaml --output out.yaml --output-fields title,id,status,author,tags --recurse rules/
    ### Run script that converts the Sigmac produced .yml to Splunk saved search stanzas in savedsearch.conf.
    - pipenv run python scripts/convert_yml_to_search.py
    ### Copies the savedsearch.conf to the appropriate Splunk TA folder
    - cp savedsearches.conf TA-dac/default
    ### Sets the TA version based on either tag version number or "0.0.1" if run by an untagged Git commit.
    - pipenv run python scripts/set_version.py --file "TA-dac/default/app.conf" --version "${CI_COMMIT_TAG}"
    ### Runs the splunk-sdk slim utility to package the Splunk TA.
    - pipenv run slim package TA-dac
  artifacts:
    ### Specify the output files as artifacts that can be retrieved in release job
    ### or downloaded via the Gitlab UI
    paths:
      - out.yaml
      - savedsearches.conf
      - 'TA-dac-*.tar.gz'
  tags:
    ### Tag job as "docker" to call the Docker Gitlab runner
    - docker

release:
  ### Run on latest python Docker image
  image: python:latest
  ### Identify as release stage
  stage: release
  before_script:
    ### Install the Python splunk-sdk library for use by deploy_splunk_package.py script
    - pip install splunk-sdk
  script:
    ### Upload the TA to Gitlab packages
    - 'curl --header "JOB-TOKEN: $CI_JOB_TOKEN" --upload-file TA-dac-${CI_COMMIT_TAG}.tar.gz "${CI_API_V4_URL}/projects/${CI_PROJECT_ID}/packages/generic/TA-dac/${CI_COMMIT_TAG}/TA-dac-${CI_COMMIT_TAG}.tar.gz"'
    ### Run the deploy_splunk_package.py to install the new TA-dac TA
    - python scripts/deploy_splunk_package.py --url "${CI_API_V4_URL}/projects/${CI_PROJECT_ID}/packages/generic/TA-dac/${CI_COMMIT_TAG}/TA-dac-${CI_COMMIT_TAG}.tar.gz" --user "$ENV_USERNAME" --password "$ENV_PASSWORD" --host "$ENV_HOST" --port $ENV_PORT
  rules:
    ### Restrict this job to only run when the main branch is tagged
    - if: '$CI_COMMIT_BRANCH == "main" && $CI_COMMIT_TAG'
  tags:
    ### Tag job as "docker" to call the Docker Gitlab runner
    - docker
Build a script SIGMAC converts the SIGMA rule logic with Splunk Spl query and outputs an Out.yaml file, which contains generated query and several other fields we will use in Splunk TA.
Then, Convert_yml_TO_SEARCH.PY converted the sigmac out.yaml file into a search section saved by Splunk and output the SAVINGSEARCHES.CONF file. In this example, the saved search configuration is to generate the built -in “alert” of Splunk, but its function is very limited. The search configuration that can be easily adjusted can be easily adjusted to create a significant event of the SPLUNK ES or call an event in the downstream systems such as Soar via API.
import yaml
import os
import glob
from jinja2 import Template


ss_template = """
[{{ title }}]
alert.expires = 5m
alert.suppress = 1
alert.suppress.period = 60m
alert.track = 1
counttype = number of events
cron_schedule = {{ cron }}
description = Detects a second malicious IP.
enableSched = 1
quantity = 0
relation = greater than
search = {{ search }}

 """


def priority_to_cron(priority):
    if priority == "low":
        return "0 */4 * * *"
    elif priority == "high":
        return "*/15 * * * *"
    elif priority == "critical":
        return "*/5 * * * *"
    else:
        return "0 * * * *"


t = Template(ss_template)

savedsearch_content = ""

rules = yaml.safe_load(open("out.yaml"))
for rule in rules:
    if rule["status"] == "stable":
        print("Creating alert for " + rule["title"])
        savedsearch_content += t.render(
            title=rule["title"], search=rule["rule"][0], cron=priority_to_cron("normal")
        )
    else:
        print(
            'The rule "'
            + rule["title"]
            + '" status is set to '
            + rule["status"]
            + ", skipping."
        )

f = open("savedsearches.conf", "w")
f.write(savedsearch_content)
f.close()
Set_version.py is used to update the version number contained in the App.conf Splunk TA file.
import argparse
import re


def set_version(conf_file, version):
    if version == "":
        version = "0.0.1"
    elif re.match(".*(\d)+\.(\d)+\.(\d)+.*", version):
        version = (re.search("(\d)+\.(\d)+\.(\d)+", version)).group()
    else:
        print("An invalid version number was tagged " + version)
        exit(1)
    print("Updating app.conf file with version number: " + version)
    with open(conf_file, "r") as file:
        lines = file.readlines()
    with open(conf_file, "w") as file:
        for line in lines:
            file.write(re.sub(r "VERSION", version, line))
    with open(".env", "w") as env_file:
        env_file.write(f'export VERSION="{version}"')
    file.close()


def main():
    parser = argparse.ArgumentParser()
    parser.add_argument("--file", type=str)
    parser.add_argument("--version", type=str)
    args = parser.parse_args()
    set_version(args.file, args.version)


if __name__ == "__main__":
    main()
The SPLUNK-SDK Slim Package command is used to build and generate TA .pkg files. Publish work script Finally, deploy_splunk_package.py script interacts with the Splunk Rest API to upload and install the latest version of TA during the deployment stage of the pipeline.
from logging import error
import splunklib.client as client
import os
import argparse


def upload_ta(url, user, password, host, port):
    service = client.connect(
        host=host, port=port, username=user, password=password, verify=False
    )
    service.post(path_segment="apps/local", filename=True, name=url, update=True)
    service.logout()


def main():
    parser = argparse.ArgumentParser()
    parser.add_argument("--url", type=str)
    parser.add_argument("--user", type=str)
    parser.add_argument("--password", type=str)
    parser.add_argument("--host", type=str)
    parser.add_argument("--port", type=str)
    args = parser.parse_args()
    upload_ta(args.url, args.user, args.password, args.host, args.port)


if __name__ == "__main__":
    main()
Detective content creation workflow Before creating a workflow, you need to modify the pipFile
[[source]]
url = "https://pypi.org/simple"
verify_ssl = true
name = "pypi"

[packages]
sigmatools = "0.20"
 "ruamel.yaml" = "0.16"
jinja2 = "*"

[dev-packages]
black = "*"

[requires]
python_version = "3.8"

[pipenv]
allow_prereleases = true
Modify the rules in the .gitLab-Ci.yml.
  rules:
    - if: $CI_COMMIT_BRANCH == "main"
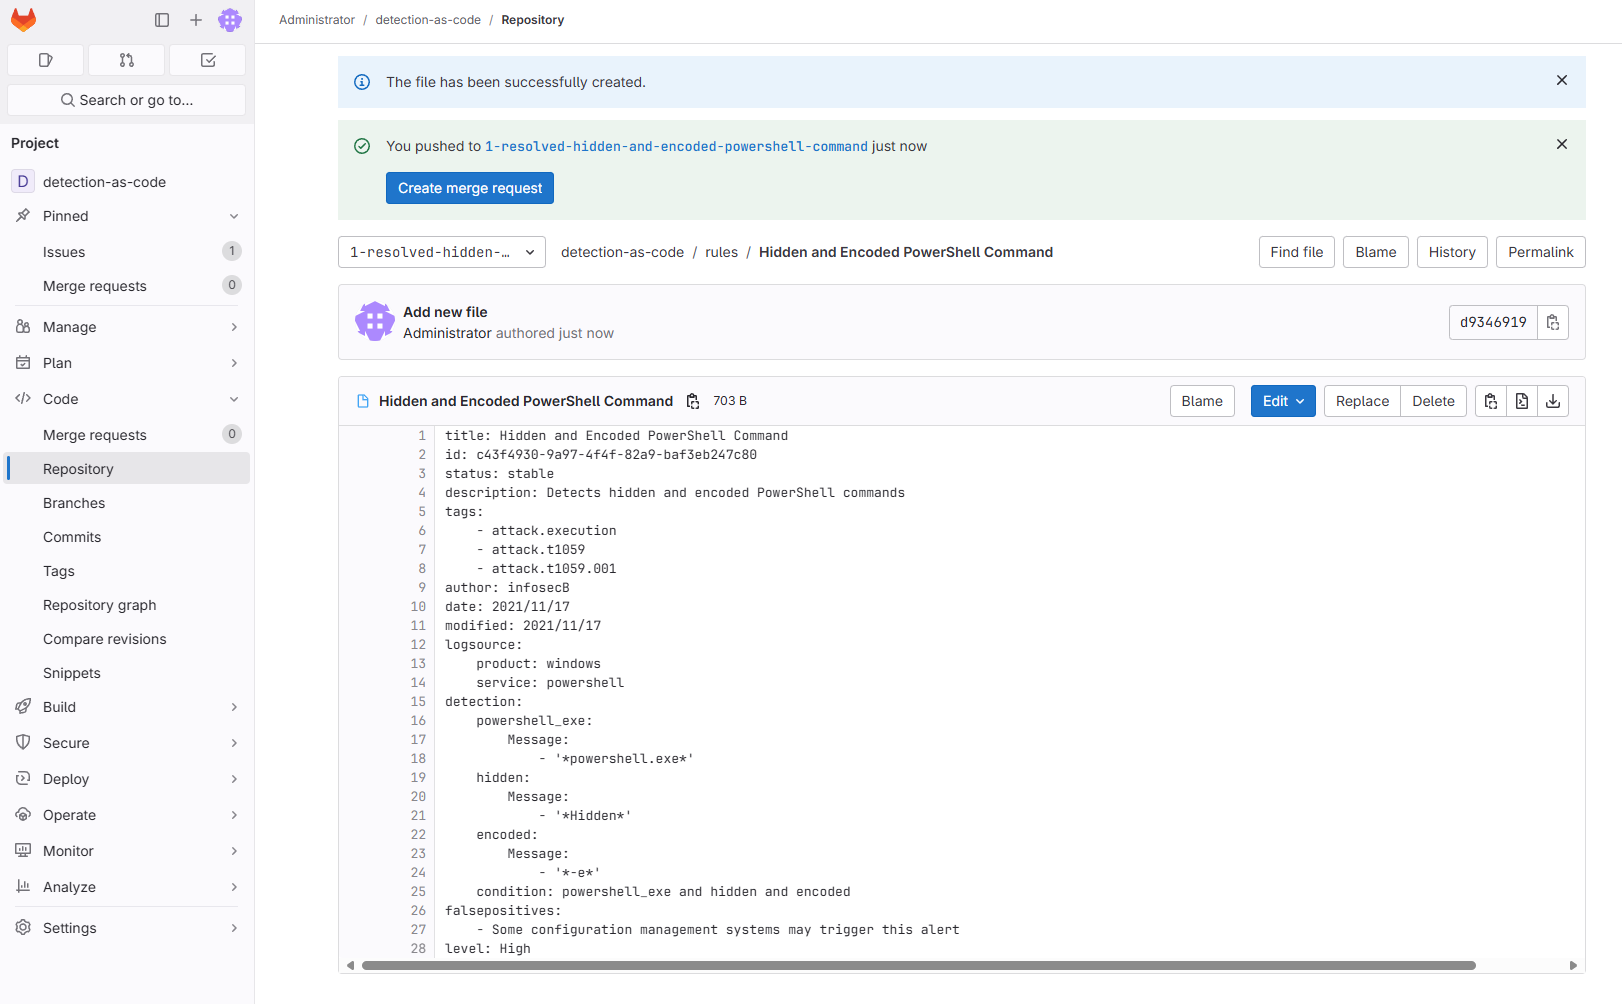
Threat testing team personnel can now create, review and deploy new content in accordance with simple procedures. In this example, I will run the same examples used in the server -free detection pipe: detect the use of PowerShell coding and hidden commands.
Verify
Run
Create a gitlab issue for mergers and associated requests in the “Detection As Code” project.
Create the SIGMA rules on the new branch .yml, and the merger request was marked as “ready” after completion. Each time it is submitted to the project, no matter what the branch is submitted, “build” operations. If there is a problem with the detection content, the homework will fail and output errors.
After the new rules are completed, trigger the BUILD JOB

Create a new merger request after the operation of Build Job successfully operated
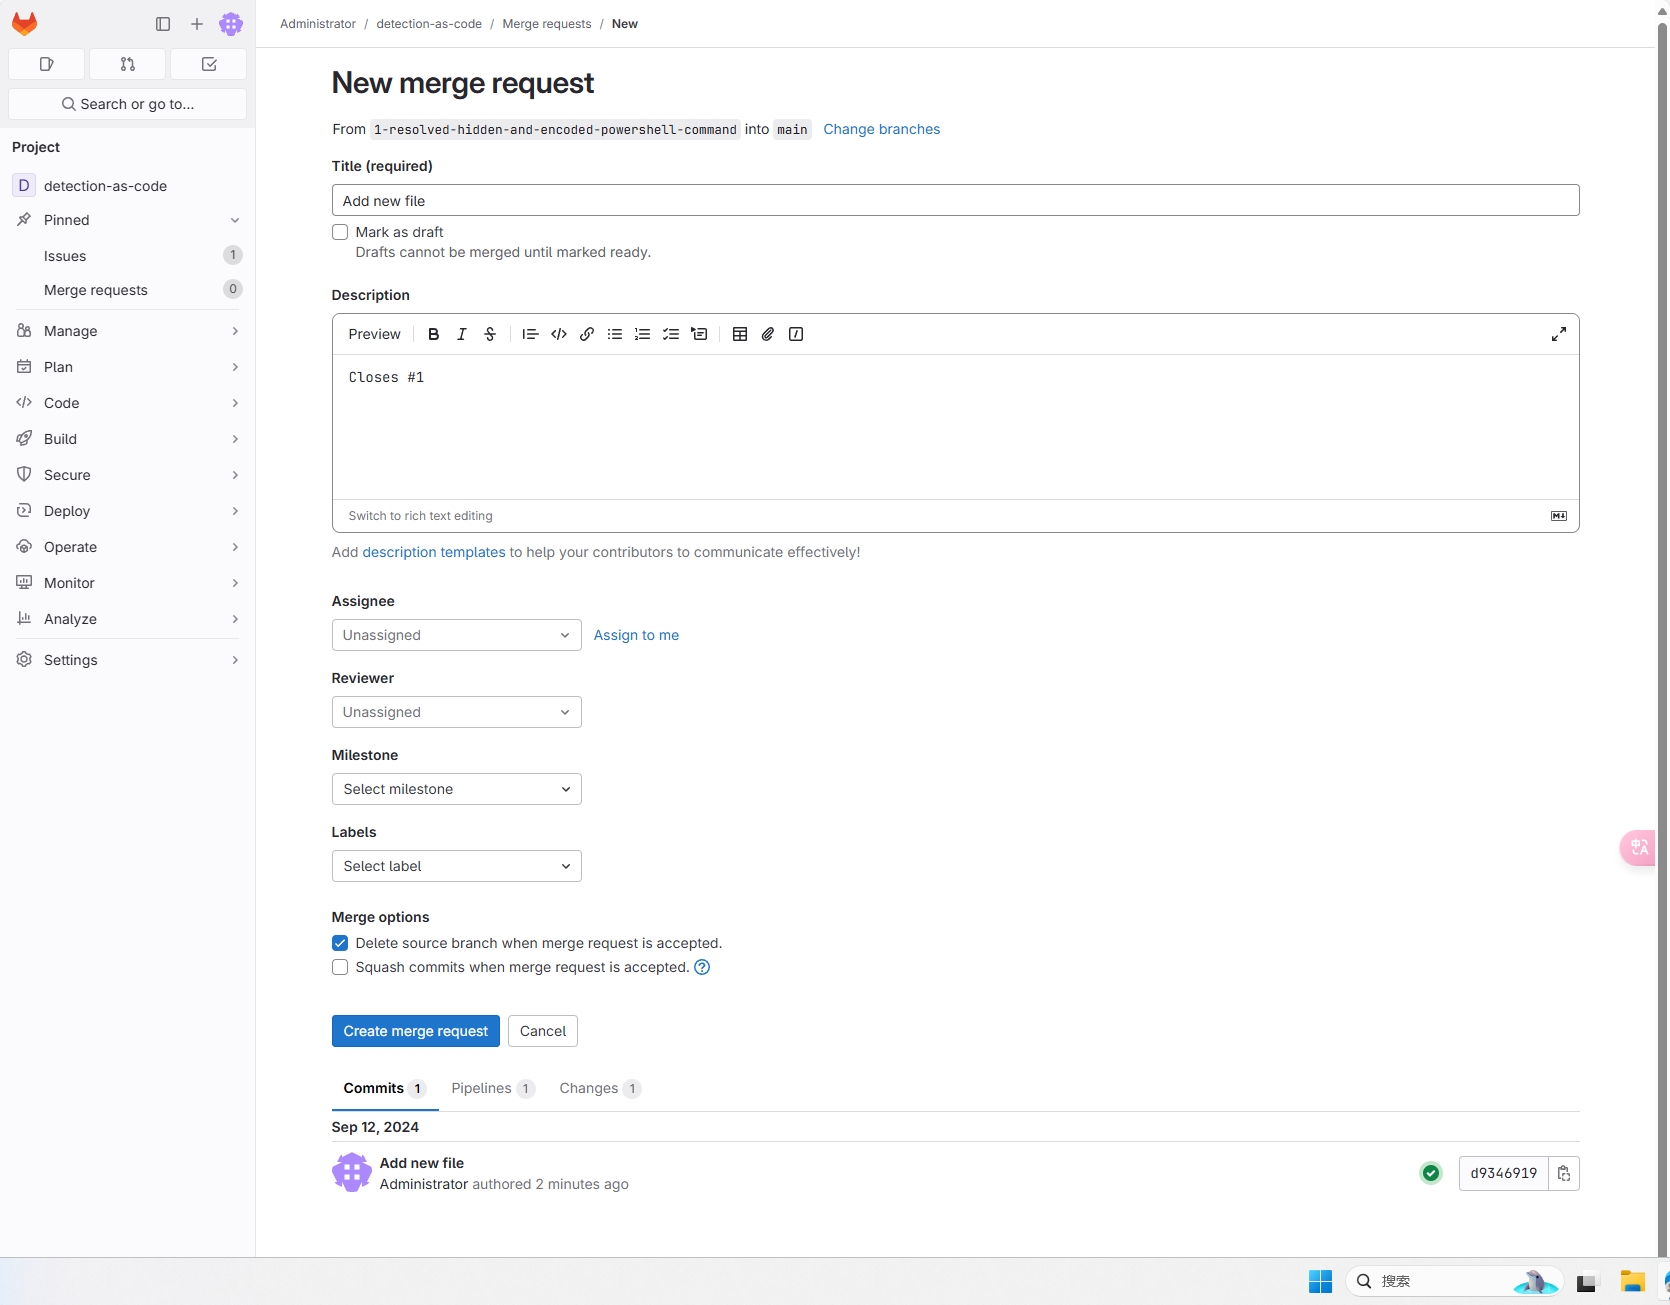
The team members conducted a peer review of the detection content, and then comment and edit them as needed. After the review and consent, it is merged into the main branch.

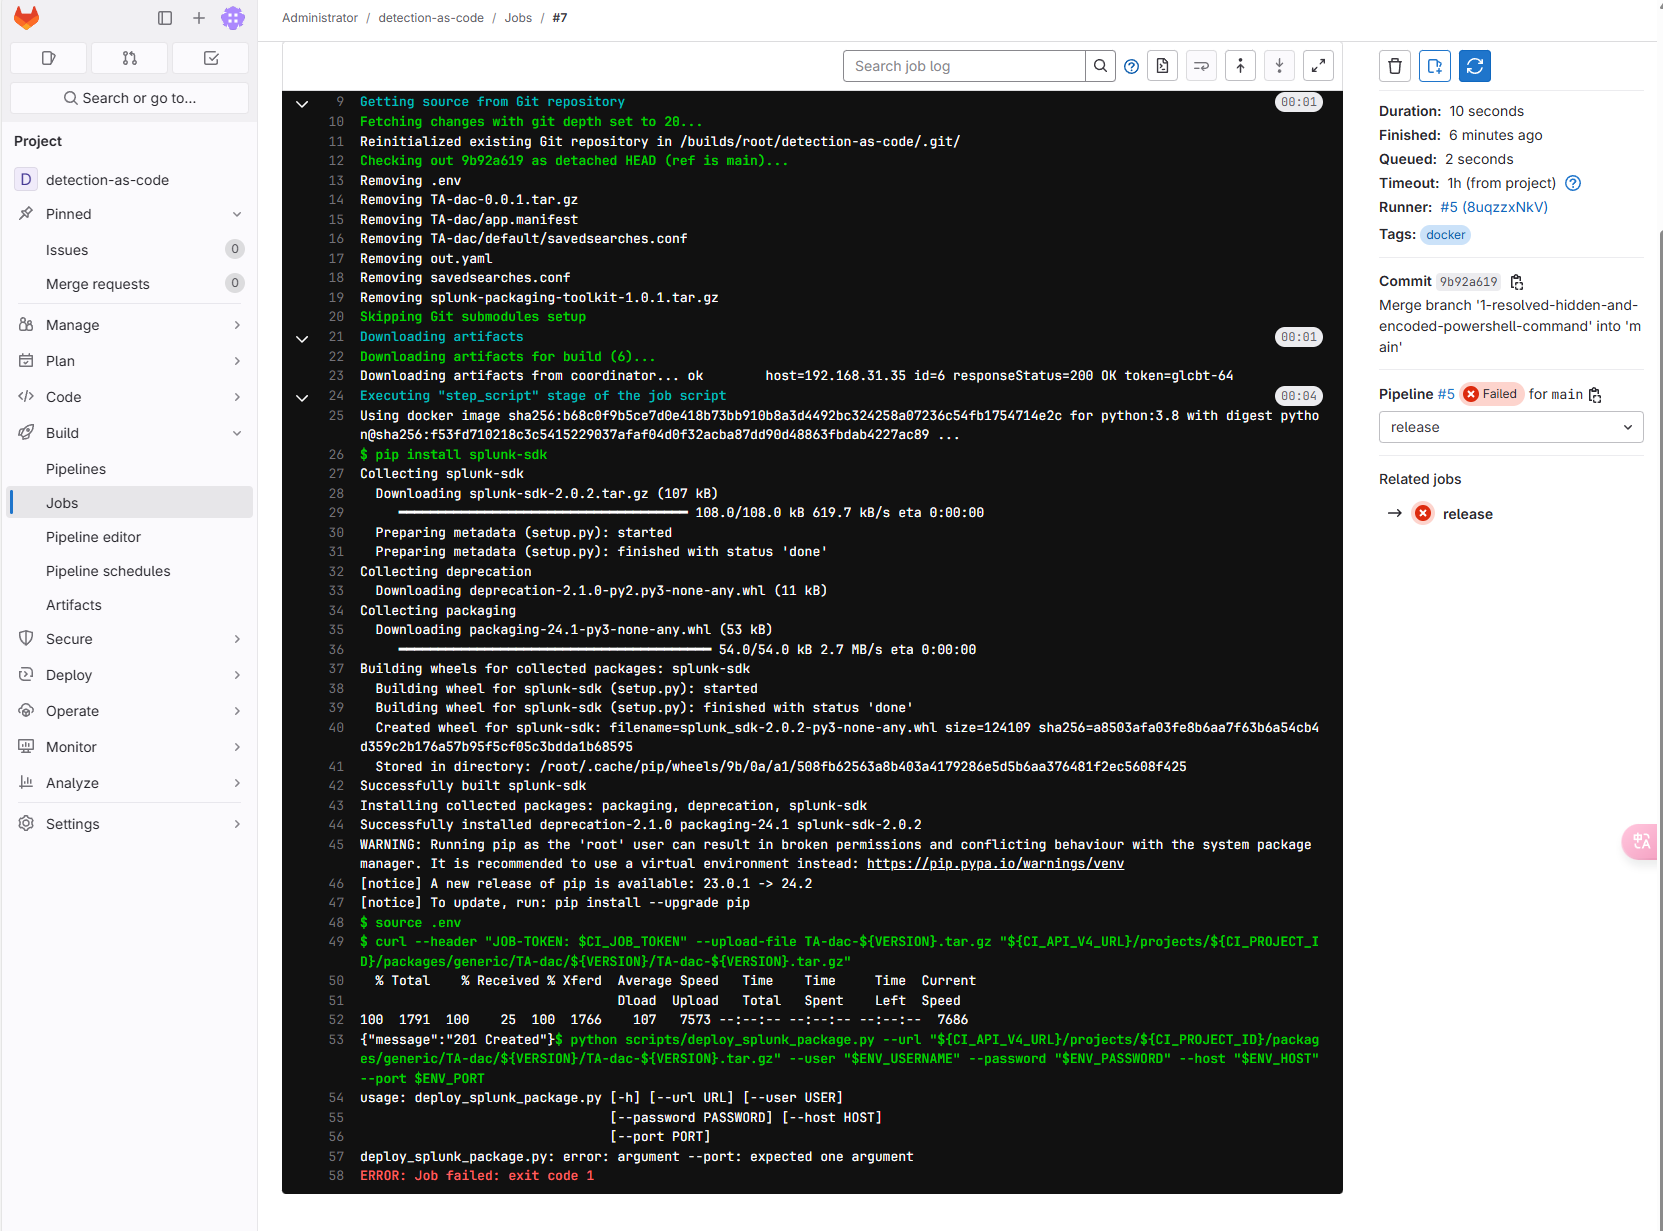
The first run of PIPELINE needs to configure the variable when running, namely the Splunk address, password, port, user name. When adding a password, you need to configure Masked to facilitate the mask in the JOB log. The port is the Splunk API port 8089.

Notice
The lack of running variables when running the first runtime will cause the push task to fail.
 Splunk address, password, port, user name configuration reappear the task after completion.
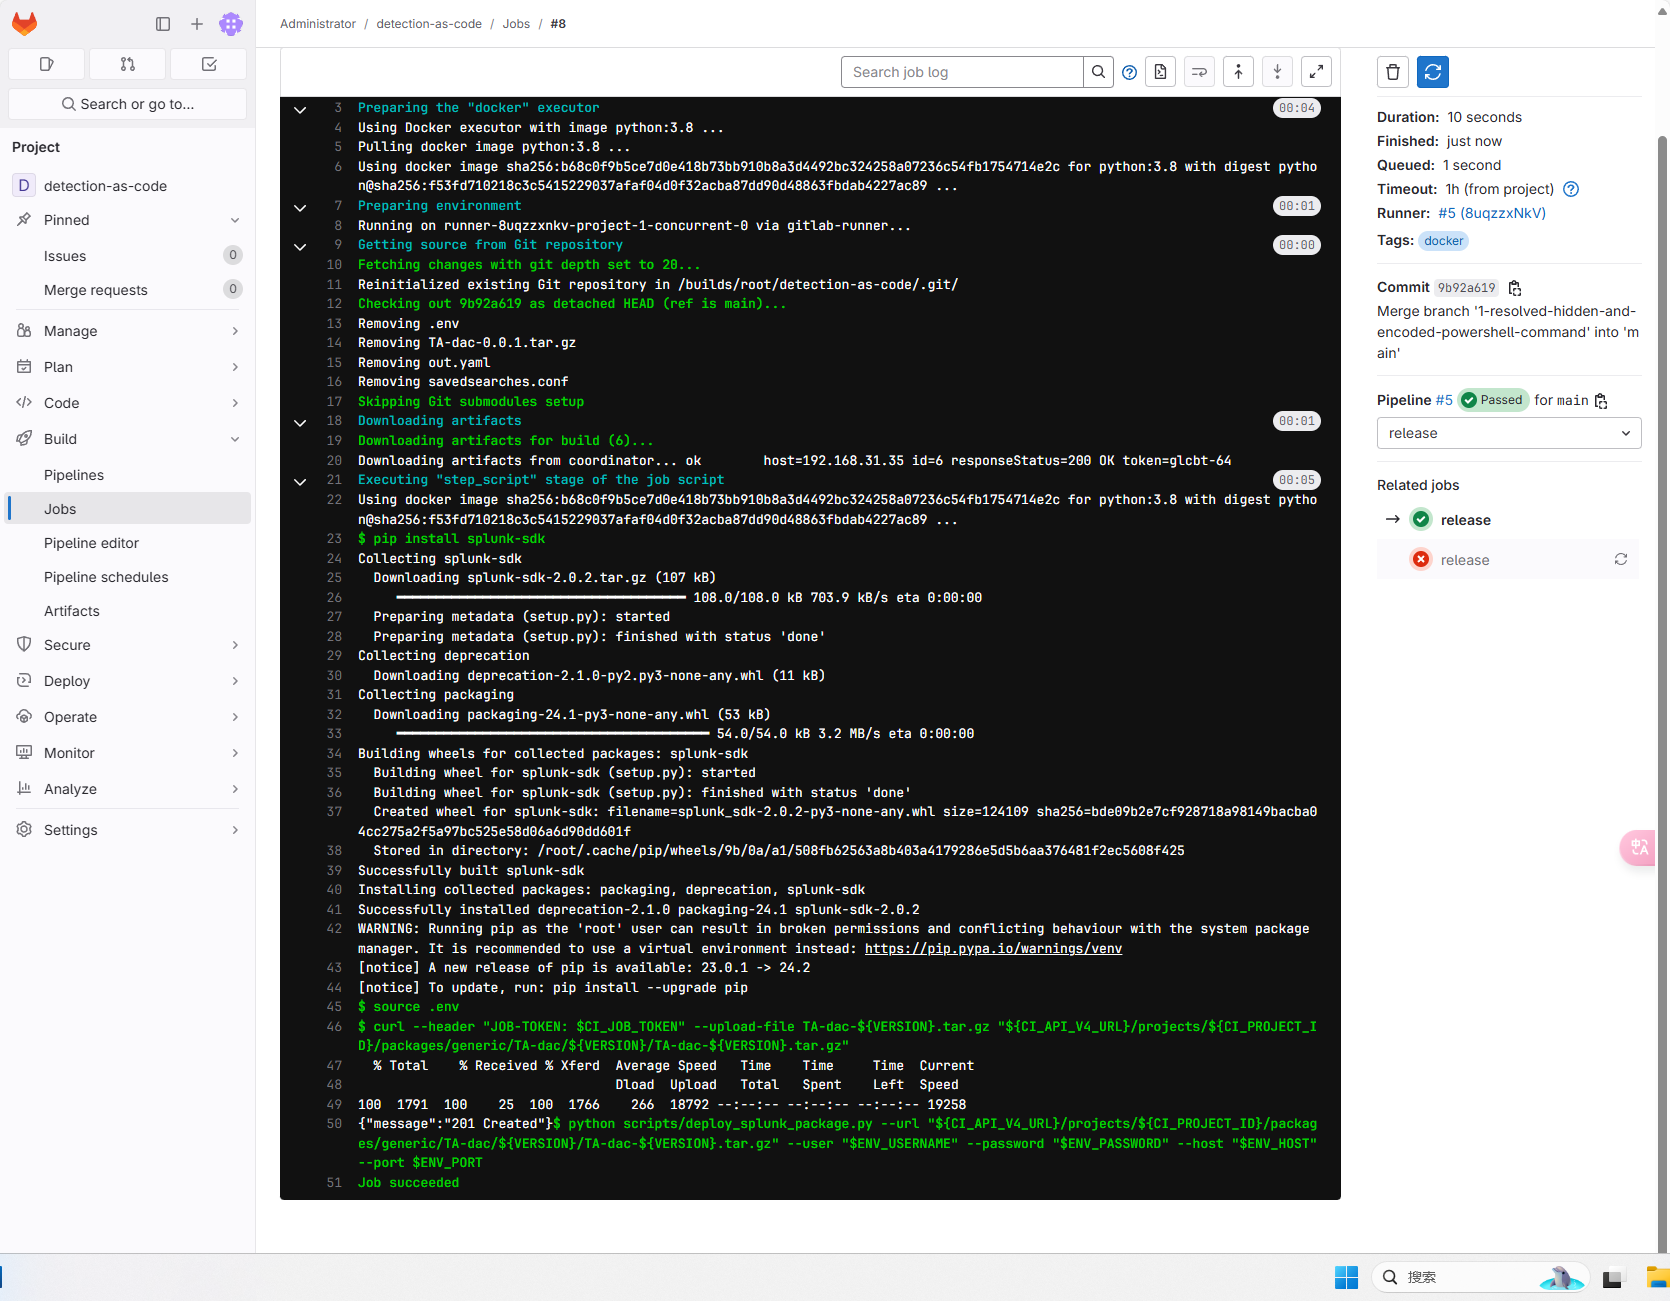
After running successfully, log in to Splunk for viewing. You can see that Splunk has created a new alarm rule.
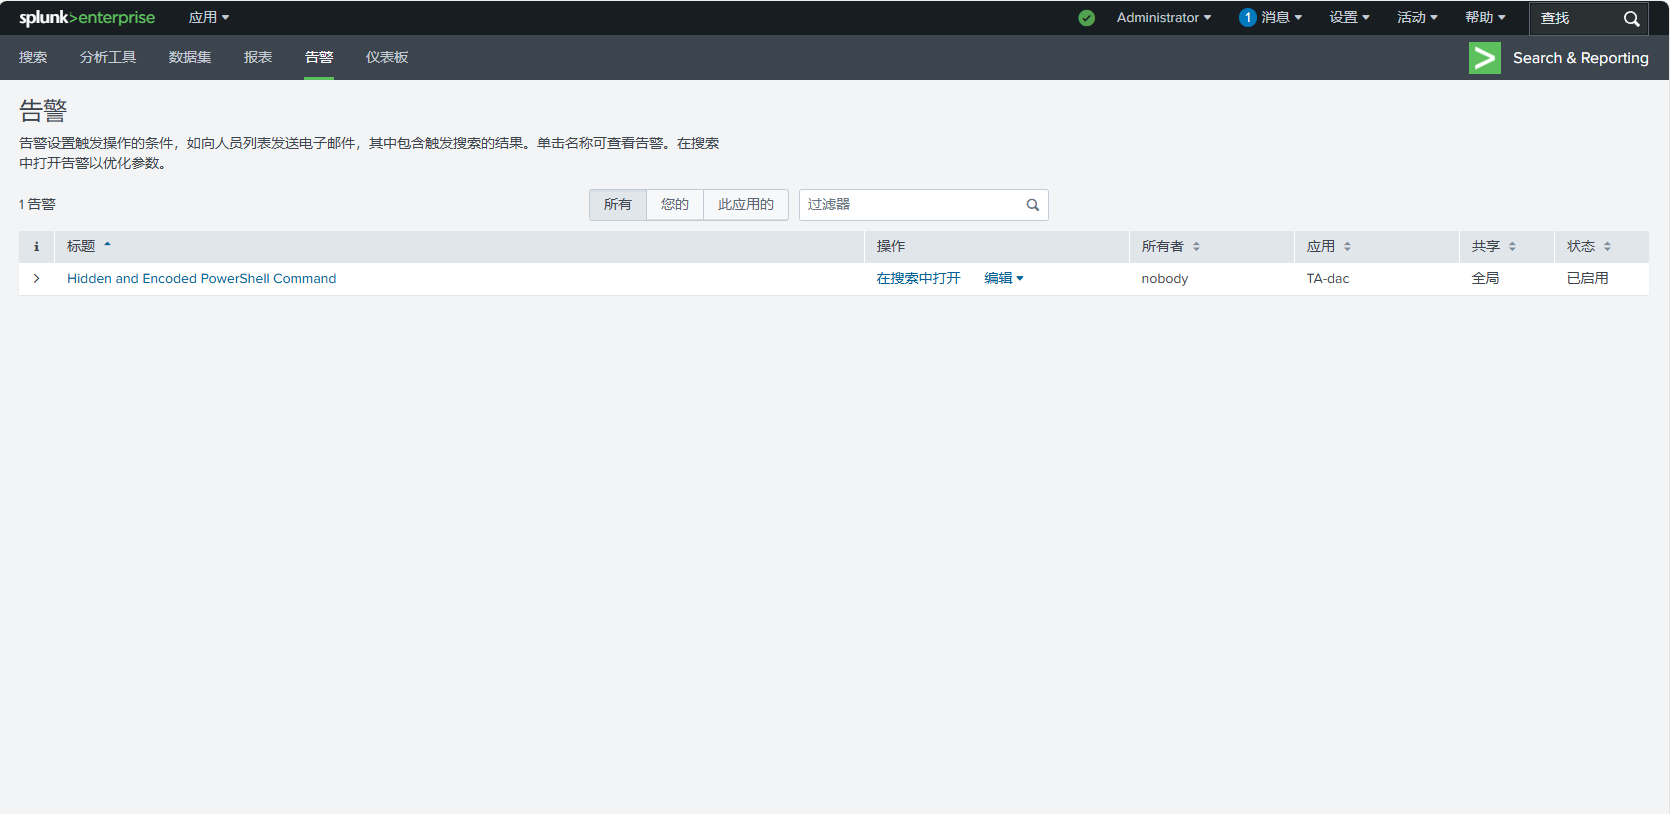
Open in the search, you can see the log content that has matched the detection rules.

Conclusion
Although this example pipeline demonstrates the basic functions of the construction and publishing detection content, it still has many shortcomings. Gitlab CI/CD provides more functions to run effective “detection is code” pipeline. You can create some additional pipeline operations for continuous review of testing, document records, and test content:
Automation SIGMA and Splunk TA test: In order to ensure high -quality content and CI/CD pipelines running smoothly, testing should be created to check the effectiveness of SIGMA rules and SPLUNK TA.
Automation document: The important part of the detection content document can be included in each SIGMA rule. This creates an opportunity to automatically generate documents in the CI/CD pipeline by writing the creation script of the .md or .st files.
Continuous review and testing content: Ci/CD pipes can be created to mark outdated detection content to review the new GitLab problem.
Reference document
Serverless detection pipeline(https://infoscb.medium.com/building-a- serverless-detection-platform-in -AWS–I-Endpoint-DETECTL
Practical detection-as-code
detection-as-code(https://github.com/infosecb/detection- as-code)